Do My First Push-Up
Progress from a manageable incline to one controlled floor push-up.
 Ask Murph to help
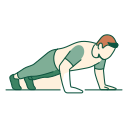
The fastest path to a first push-up is practicing the same movement at an incline that allows complete, controlled reps, then lowering that incline as strength improves. Repeated failed attempts from the floor are usually slower. A wall, counter, sturdy table, bench, and floor form a natural progression.
A push-up asks the chest, shoulders, triceps, and trunk to work together. The body should move as a unit, but there's no prize for a perfectly rigid pose. Use a hand width and elbow path that feel strong, and an incline that lets the chest and hips rise together.
What to do
- Practice push-ups two or three times a week with a recovery day between hard sessions.
- Use a stable incline where you can complete 5 to 10 clean reps.
- Lower the chest toward the support, keep the hands planted, and press the whole body away.
- Add rows or pulldowns to balance the pressing and build shoulder support.
- Train the triceps with a press or extension if they clearly limit the movement.
- Try the floor only occasionally; build capacity through successful reps.
Knee push-ups build strength too, but an incline keeps the straight-body pattern and offers smaller progression steps. Use whichever lets you train well. If your wrists dislike a flat palm, push-up handles or dumbbells give a neutral position.
A simple plan
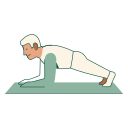
Three times a week, warm up with a few easy reps at a high incline. Then pick a lower incline and do three sets of 5 to 8 reps, stopping with two good reps in reserve. Rest 90 seconds or more. Follow with two sets of a row and a short front plank or dead bug.
When all three sets reach eight reps with the chest touching the same point and the body moving together, lower the hands a few inches. Reps may drop back to five; build them up again. If the jump between surfaces is large, put the hands on a step, use a Smith-machine bar, or add one slow lowering rep from the floor after the incline work.
After two or three weeks of progress, try one floor push-up at the start of a rested session. If it doesn't happen, go back to the plan. The incline is still lower than it was, and that is real progress.
How to know it is working
Record the support height and the number of consistent reps. A lower surface at the same reps is the clearest sign. You may also notice a slower, more controlled floor lowering or the ability to pause near the bottom.
Film one set from the side every few weeks. Look for the shoulders, hips, and chest rising together. Don't obsess over a small difference in elbow angle. A completed rep on a stable support through a repeatable range matters more than copying one visual ideal.
If you get stuck
If the hips sag, raise the incline and add short trunk-control work. If the elbows give out, add a close-grip incline push-up or triceps extension. If the shoulders feel unstable, go slightly higher and build rows before retrying the lower level.
Progress stalls when practice is too rare or every session goes to failure. Leave something in reserve, recover, and pile up good reps. Body weight changes the challenge, but the goal doesn't require weight loss; the movement can be scaled at any size.