Do a Pistol Squat
Build the single-leg strength, ankle range, balance, and control for one pistol squat.
 Ask Murph to help
A pistol squat combines deep single-leg strength, balance, ankle range, hip control, and keeping the free leg clear. Scale it with a box, counterweight, heel lift, or hand support rather than dropping into a position you can't control.
Longer legs and limited ankle dorsiflexion can push the torso farther forward, which isn't automatically bad. What matters is a planted foot, a knee that tracks under control, and a descent and ascent you own.
What to do
- Build strong split squats, step-downs, and single-leg box squats first.
- Work on ankle dorsiflexion if the heel lifts or you fall backward.
- Use a stable support to learn the path through a bigger range.
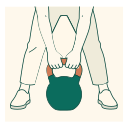
- Hold a light counterweight in front if it improves balance and lets the leg work.
- Train both sides, and accept that progress may not match.
- Practice two or three times a week with low-fatigue sets.
A counterweight or heel lift isn't cheating; it changes the balance and ankle demand. Use those tools as steps toward an unassisted flat-foot pistol and reduce them gradually.
A simple plan
Twice a week, do three sets of 5 to 8 rear-foot-elevated split squats or step-downs per side, then three sets of 3 to 5 box pistols, sitting to a height you can control without collapsing. Finish with a supported ankle-rocking drill and calf work.
Lower the box a little once every rep is smooth. Below knee height, try holding a light weight in front and descending farther without sitting fully. Use a door frame, suspension strap, or rail for just enough hand support to finish the bottom range.
When the full path becomes possible, practice single reps. Stop well before fatigue turns the movement into a fall. Several rested singles teach the skill better than one high-rep set.
Keep ordinary two-leg strength work in the program; squats, hinges, and calf raises build force that skill attempts alone can't. If your sport already involves many single-leg landings or lunges, cut accessory volume so the skill isn't another source of fatigue.
Use the same shoes and surface each time; a raised heel, cushioned shoe, or slippery floor can change balance and depth a lot. Note the setup before comparing results.
How to know it is working
Track box height, counterweight, heel lift, hand assistance, and depth. Less assistance at the same control is the clearest trend. Also note whether the knee and foot stay steady and whether you can pause at the bottom.
Film from the front and side every few weeks. Look for control, not a perfectly vertical shin or torso. Compare each side with its own past performance.
If you get stuck
If you fall backward, try a counterweight and work on comfortable ankle range. If the leg can't drive out of the bottom, build deeper split squats, step-downs, and supported pistols. If balance is the only limiter, keep fingertip support longer while the leg gets strong.
Knee discomfort may ease with a higher box, slower progression, or a different foot and hip position. Don't force depth because mobility content says everyone should squat the same way. If one side is sharply painful or keeps giving way, pause the skill and address that problem.